

How to Wash a Duvet and Keep It Perfectly Fluffy
Washing a duvet at home is a simple task when you know the secrets. You'll need a large-capacity front-loading machine, a gentle or bulky cycle with warm water, and a specific mild, low-suds detergent. But the real game-changer for that perfectly fluffy result? Drying it on low heat with dryer balls to obliterate clumps and ensuring it's 100% dry before it returns to your bed. Don't wait—get this done today for a better night's sleep tonight.
Your Pre-Wash Checklist for a Perfect Clean
Before your duvet sees a drop of water, a few minutes of prep is your only defence against a lumpy, expensive mistake. I've seen it happen—rushing this part leads to poorly cleaned or permanently damaged bedding. Your goal isn't just to get it clean; it's to restore its original loft and extend its life for years. Act now to protect your investment.
Decode the Care Label
First, find that care tag. It's your non-negotiable roadmap. This small label holds critical info, telling you if it's machine washable (look for a tub icon) or dry-clean only (a circle). It also dictates the ideal water temperature, usually shown by dots inside the tub icon—one dot means cold, two means warm.
Knowing your duvet's fill is crucial for immediate action:
- Down or Feather: These natural fills are delicate. They demand a gentle touch because harsh detergents or high heat will destroy their loft instantly.
- Synthetic (Polyester/Microfiber): These are tougher, but don't get complacent. High temperatures can literally melt the fine fibers, causing them to clump together permanently.
Use this cheat sheet to make the right call, right now.
Duvet Care Label Cheat Sheet
This table is your instant reference for decoding the symbols on your duvet's care label, empowering you to make the correct decision immediately.
| Material Type | Recommended Washing | Detergent Choice | Drying Method |
|---|---|---|---|
| Down/Feather | Gentle/delicate cycle, warm water (max 40°C/104°F) | Mild, low-suds, down-specific detergent | Tumble dry low with dryer balls, ensure completely dry |
| Synthetic (Polyester) | Bulky/gentle cycle, warm water | Mild, low-suds liquid detergent | Tumble dry low to medium heat, check for clumps |
| Wool | Hand wash or wool cycle, cold water only | Wool-specific detergent (e.g., Woolite) | Air dry flat away from direct sunlight; no machine drying |
| Silk | Dry clean recommended; or hand wash cold | pH-neutral silk detergent | Air dry away from heat and sun; do not wring |
| Cotton Shell (any fill) | Check fill instructions; cotton can handle warm water | Depends on fill material; avoid harsh chemicals | Follow fill instructions; cotton can handle medium heat |
Always double-check your duvet's tag—blends and special treatments can change the rules.
Check Your Machine Capacity
One of the biggest obstacles to washing a duvet at home is machine size. A standard washer is no match for a queen or king-size duvet. If you cram it in, water and detergent can't circulate, leading to a poor clean and putting immense strain on your washer's motor.
Use this quick test right now: Place your dry duvet in the machine. If it fills more than two-thirds of the drum, it's too crowded. You need ample room for it to tumble and rinse thoroughly.
If your machine is too small, don't risk it. A trip to the laundromat to use their industrial-sized front-loaders is a safer, more effective choice. For a full rundown before you start, this comprehensive guide on washing doonas for a fluffy clean is an excellent resource.
Inspect for Damage and Choose the Right Soap
Give your duvet a quick once-over. Hunt down small rips, loose threads, or weak seams. The washing machine will turn a tiny hole into a catastrophe, unleashing a blizzard of filling. A few quick stitches beforehand will save you a world of trouble.
And for those with allergies, choosing bedding made from the best fabrics for sensitive skin makes a huge difference in reducing irritation. Find more info here: https://teddypaws.co/blogs/news/best-fabrics-for-sensitive-skin
Finally, never use your regular laundry detergent. Standard soaps create excessive suds that are a nightmare to rinse from a duvet's dense filling. Leftover soap residue makes the filling clump and can trigger skin irritation. Instead, grab a gentle, low-suds formula made for delicates. A little goes a long way—using more won't make it cleaner, it will just make it impossible to rinse.
Setting Up Your Washing Machine for Success
With your duvet prepped, it's time for the main event. Dialing in your washing machine settings is where you lock in a perfect result, guaranteeing your duvet emerges clean, fluffy, and free from damaging residue.
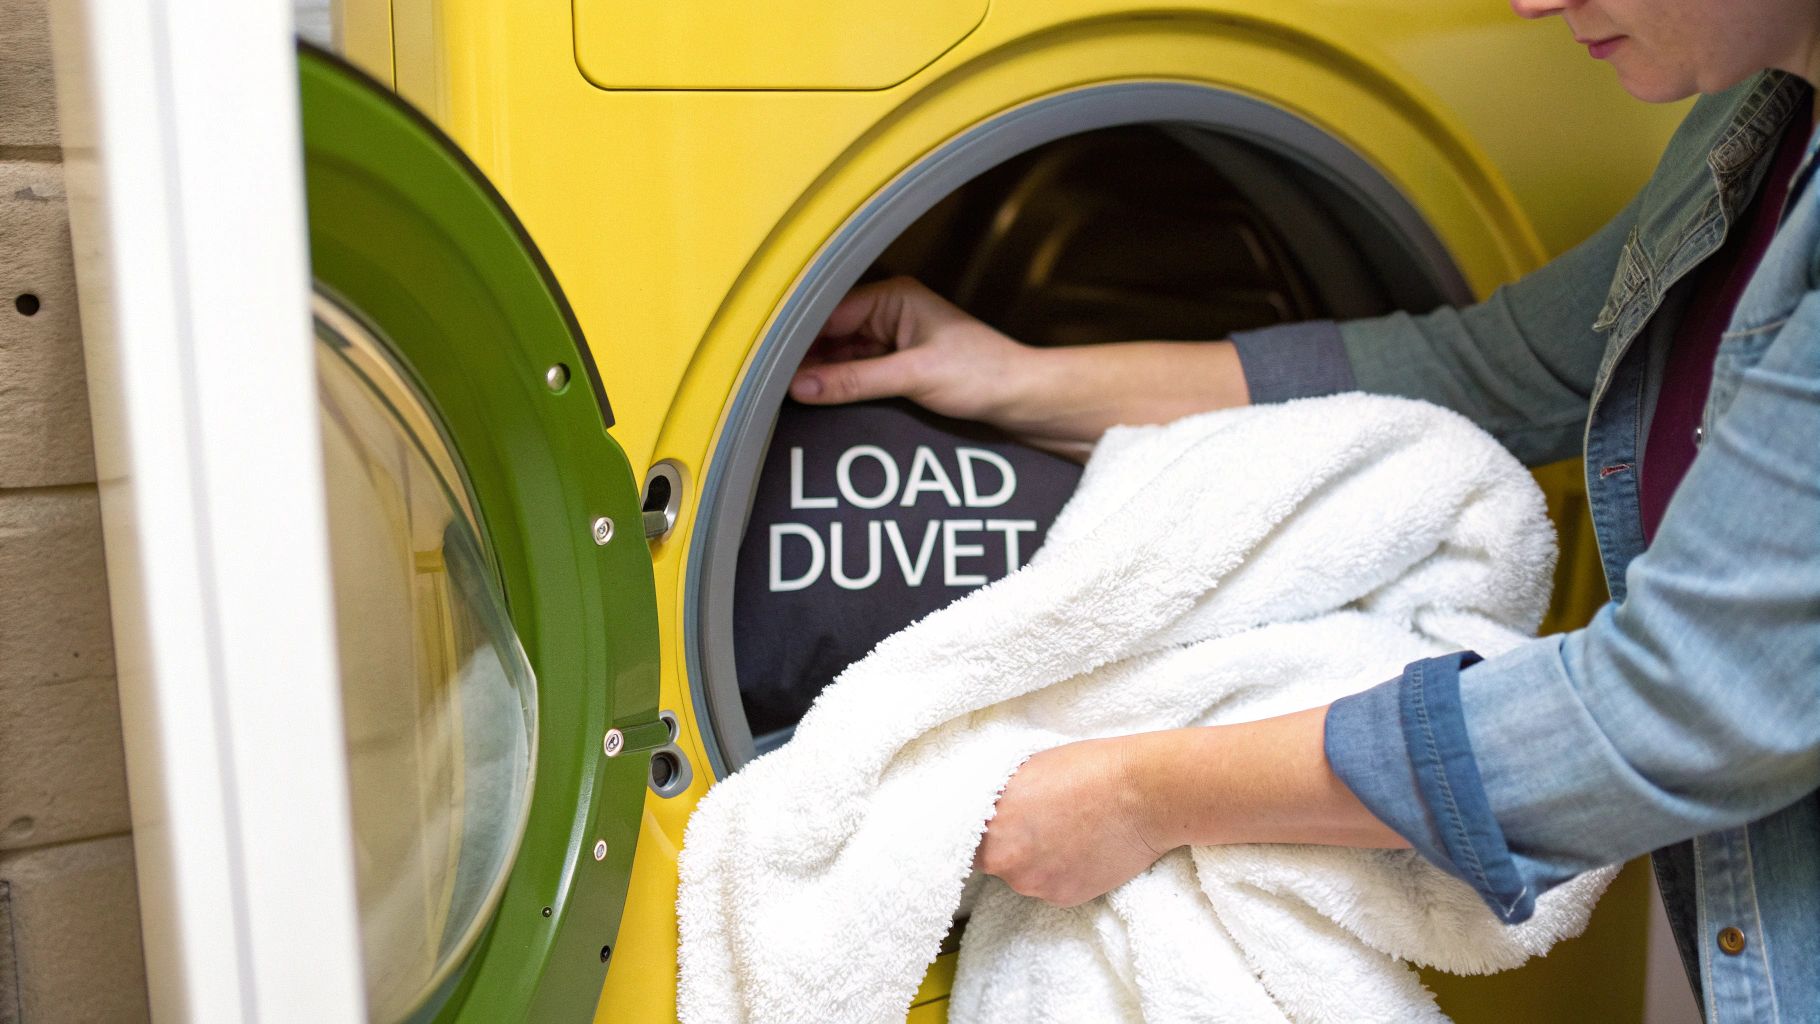
The first challenge: loading it correctly. Don't just cram it in—that's a rookie mistake that leads to a lopsided, thumping wash cycle. Instead, gently feed the duvet into the drum, spreading it out evenly. This simple action prevents the machine from banging around and ensures a superior clean.
Choosing the Perfect Cycle and Temperature
With your duvet loaded, you must select the right cycle. Your machine has many options, but for a bulky item, be strategic.
- Bulky or Bedding Cycle: This is your best option. These cycles are engineered for large items, using more water and a slower spin to clean thoroughly without crushing the filling.
- Delicate Cycle: If you lack a "Bulky" option, "Delicate" is your next best choice. It provides the gentle action needed to protect seams and fibers.
Now for temperature. It's tempting to use hot water for a deeper clean, but this is a critical error. Hot water strips the natural oils from down feathers, leaving them brittle. For synthetics, it can melt the fibers, causing them to clump permanently. You must stick with warm water (around 40°C or 104°F). It’s the sweet spot for an effective wash that’s safe for the filling.
If you found spots during your inspection, a quick pre-treatment now will work wonders.
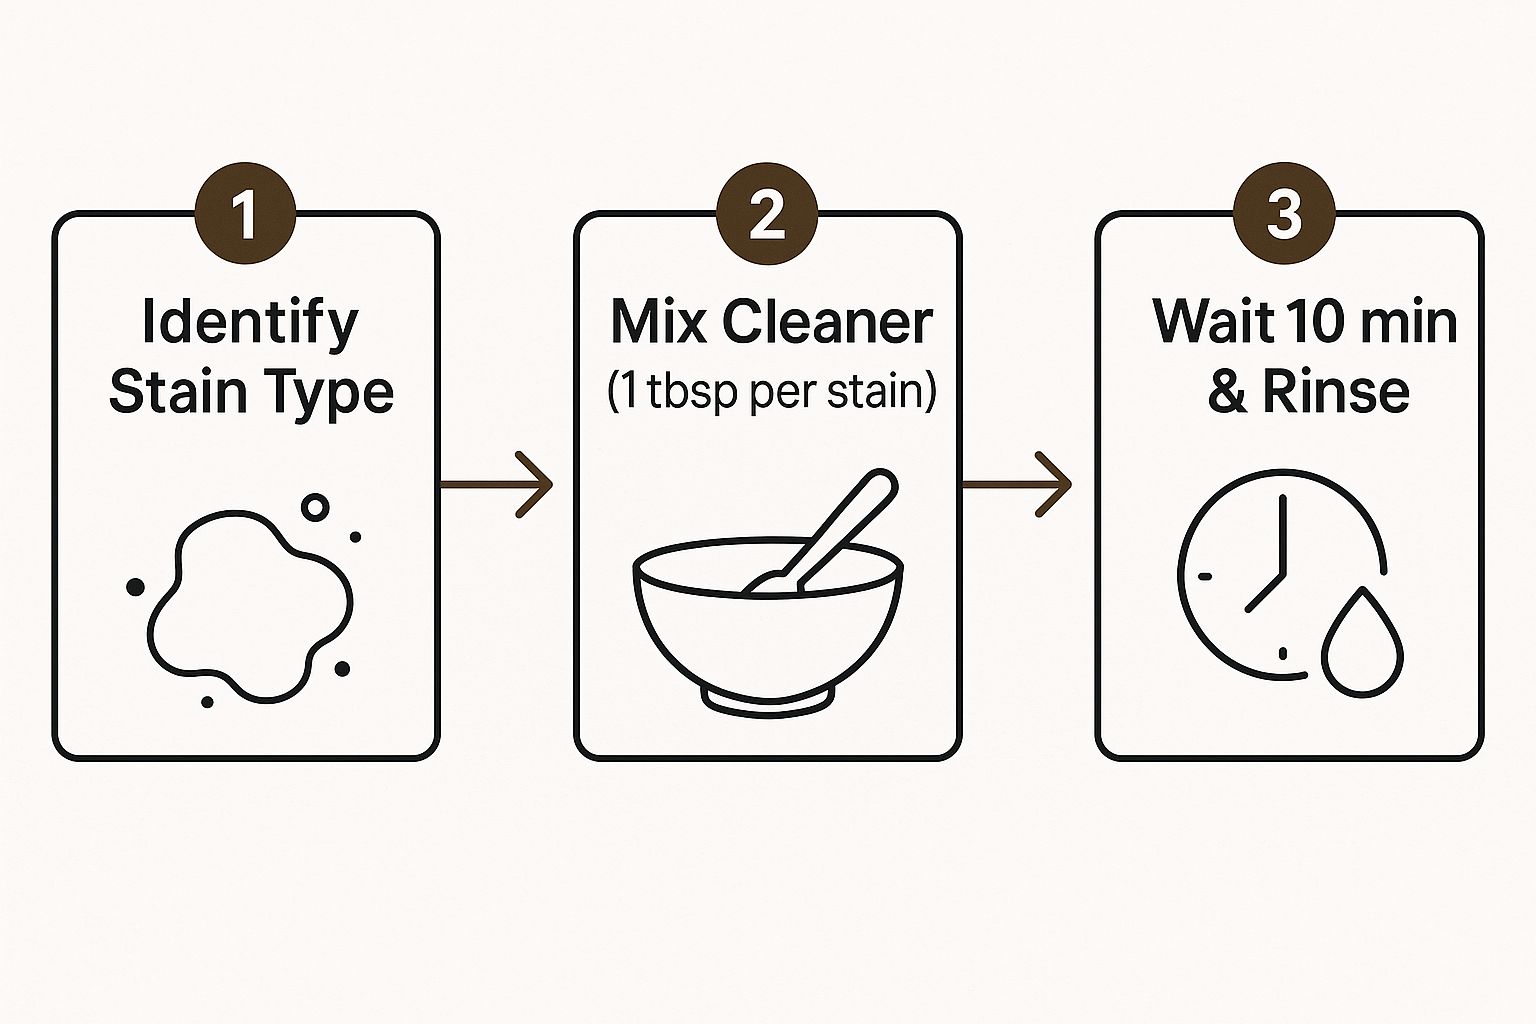
As you can see, a methodical approach to stains beforehand makes a massive difference in the final result.
The Pro Tip for a Residue-Free Finish
Here’s the trick that guarantees a professional-level clean: add an extra rinse cycle. Do not skip this. Duvets are thick and absorbent, making it hard for a standard cycle to flush out all the soap. Leftover detergent is the primary cause of skin irritation and stiff, clumpy filling.
A second rinse is your insurance policy. It ensures every last bubble of soap is washed away, leaving the filling truly clean, soft, and allergen-free. It's one extra button press that delivers a huge impact.
Here's a common problem with an easy fix: a queen-size duvet that's too small to balance the drum on its own. The solution? Toss in a couple of light-colored bath towels. They add just enough weight to balance the load, helping the machine tumble evenly and letting water circulate freely. This one trick can save your machine from violent shaking and give you a much better clean.
The Secret to Drying a Duvet Without Lumps
Washing is just the beginning; the real magic happens in the dryer. This is your only chance to restore that cloud-like fluffiness. Rushing this step will result in a lumpy, mildew-scented mess, wasting all your effort. Getting this right is the key to making your duvet feel brand new again.
A machine dryer is the only effective method, but the settings are critical. Your golden rule must be low and slow. High heat is a complete disaster for both down and synthetic fills—it makes natural feathers brittle and melts synthetic fibers, creating permanent clumps that no amount of shaking can fix.
Your Secret Weapon Against Clumps
To achieve a perfectly even, fluffy dry, you must break up the filling as it tumbles. This is where dryer balls are a total game-changer. They work their way into the duvet, preventing the fill from clumping into dense, wet pockets.
Don't have dryer balls? Don't wait. A couple of clean tennis balls inside old socks work just as well. The sock is a crucial trick to stop any yellow dye from transferring onto your clean duvet. The constant bouncing is what separates the fibers, allowing warm air to circulate and dry everything evenly.
The single biggest mistake you can make is letting the dryer run uninterrupted. A "set it and forget it" approach will always result in a lumpy duvet with damp spots hidden deep inside.
This is why you must be hands-on during the drying cycle.
The Proven Shake-and-Tumble Method
Here’s the proven strategy for lump-free results. Do not just toss your duvet in the dryer and walk away. Commit to this active approach, which typically takes 90 minutes to 2 hours.
- First 30-Minute Blast: Put the duvet in the dryer with your tennis or dryer balls. Set it to a low-heat, bulky cycle and run it for exactly 30 minutes.
- The Big Shake-Up: When the timer dings, pull the entire duvet out. Take it by the corners and give it a vigorous shake—as if you're fluffing a giant pillow. Feel for any clumps and manually break them apart.
- Rotate and Repeat: Toss the duvet back into the dryer, arranging it differently. Run it for another 30-minute cycle on low. Repeat this shake-and-tumble process until it feels light, airy, and 100% dry from corner to corner.
You might notice static building up as it dries. If it becomes a problem, check out our guide on how to remove static from clothes.
This method may seem demanding, but it’s the only way to prevent hidden wet spots that lead to mildew and musty smells. The perfectly fluffy finish is worth the extra attention.
Knowing When to Call in a Professional
As satisfying as it is to wash your own duvet, sometimes the smartest move is to let a professional handle it. This isn't giving up; it's protecting your investment. Forcing a massive or delicate duvet into a home machine is asking for disaster. You could damage both your duvet and your washer.
The decision comes down to a few key factors. If you’re in doubt, a professional cleaner is always the safest bet.
When Professional Cleaning Is the Smart Choice
Consider these your non-negotiable red flags—clear signs it's time to head to the cleaners immediately:
- Delicate Materials: If your duvet is made of silk, wool, or filled with high-end goose down, do not attempt to wash it at home. These materials require specific solvents and precise temperature controls that home setups lack.
- Tough, Set-In Stains: That old red wine spill or greasy food stain needs professional-grade solvents to break it down without destroying the fabric.
- Your Machine Is Just Too Small: We've said it before, but it's critical. If your duvet takes up more than two-thirds of the drum, it's too crowded. Professional cleaners use industrial-sized machines that ensure a deep clean and a thorough rinse.
Trusting the pros is a growing trend for a reason. The global dry-cleaning market was valued at USD 74.8 billion in 2024 and is projected to nearly double by 2033. This statistic shows a clear shift toward professional care for valuable items.
The real value of a professional cleaner is peace of mind. They have the equipment and chemical expertise to protect your duvet's loft and delicate shell, adding years to its life.
Think of it as essential maintenance. For a high-quality duvet, an annual professional clean is a smart investment that prevents you from having to replace it prematurely.
If you decide professional help is the right call, it's useful to understand how dry cleaning works. It demystifies the process and shows the level of care involved.
The bottom line is simple: when in doubt, don't risk it. A professional clean is a small price to pay to keep your favorite duvet feeling amazing for years.
How to Fix Common Duvet Washing Problems
Even with the best plan, laundry day can go wrong. You open the dryer expecting a cloud of fresh fluff, only to find a lumpy mess. Don't panic—most of these mishaps are easy to fix if you act fast.
The most common failure is a lumpy, clumpy duvet that has lost its loft. This is almost always because the filling balled up and didn't dry completely. The great news? You don't have to re-wash it.
Restoring That Cloud-Like Fluff
Your dryer is your best tool here. Toss that lumpy duvet right back in on a low-heat or no-heat setting. Add wool dryer balls or clean tennis balls to help break up the clumps as it tumbles.
The key is patience. Run the dryer in short 20-30 minute bursts. After each cycle, pull the duvet out, give it a vigorous shake from all corners, and manually break up any stubborn clumps. Repeat this until it’s perfectly light and airy.
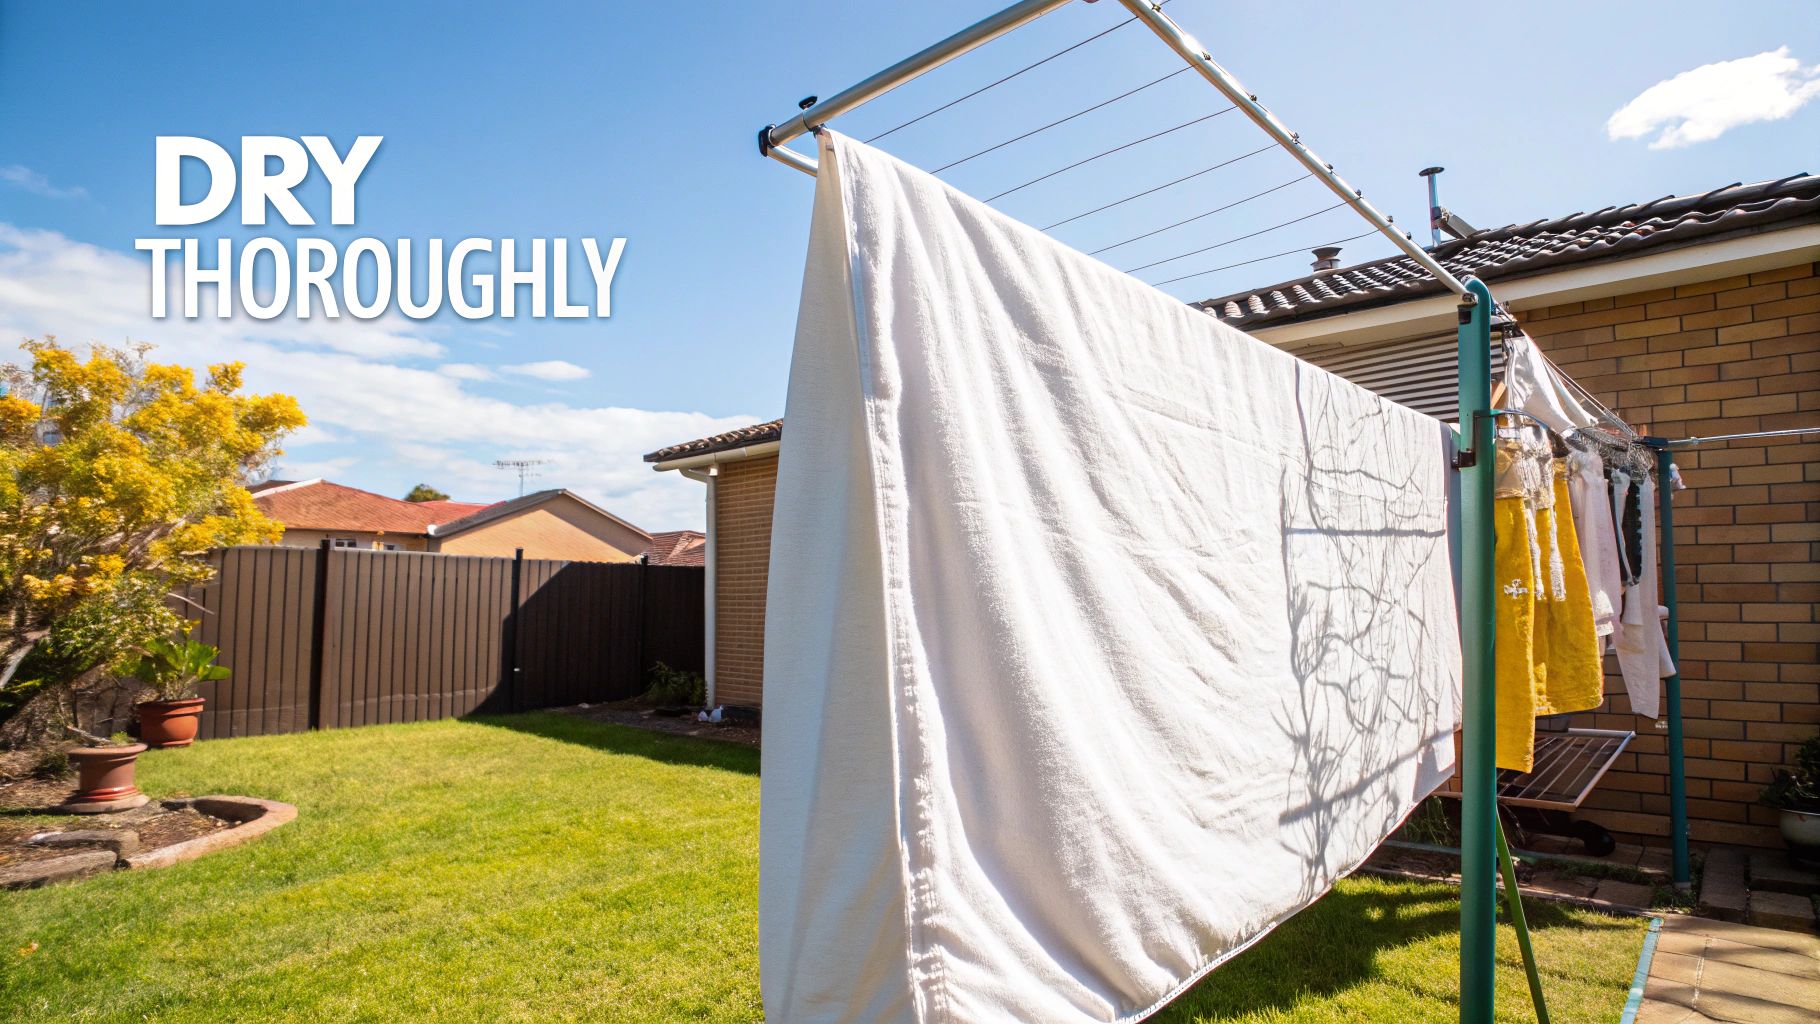
A duvet that’s even just 5% damp inside is a breeding ground for mildew. It might feel dry on the outside, but you must be sure it’s 100% dry all the way through. A few extra cycles are a small price to pay to avoid that dreaded musty smell.
If your duvet comes out smelling a bit off, it’s a clear sign that moisture is trapped inside. A quick re-wash with a special ingredient will solve it.
Tackling Lingering Odors and Soap Spots
For any damp or musty smells, you need to act now. Put the duvet back in the machine for a gentle, warm cycle. This time, add one cup of distilled white vinegar directly into the drum. Vinegar is a powerful natural deodorizer that eliminates odors without harsh chemicals.
After that cycle, run it through one more rinse-only cycle to remove any trace of vinegar. Then, it's back to the dryer with the tumble-and-shake method until it's completely dry. This two-step attack will leave it smelling perfectly fresh.
Sometimes, you might see faint white marks or stiff patches on the fabric. That’s just undissolved detergent.
Duvet Washing Problem Solver
Things don't always go perfectly, but a quick fix is usually all you need. Use this guide to troubleshoot the most common duvet washing issues immediately.
| Problem | Likely Cause | Actionable Solution |
|---|---|---|
| Clumpy Filling | Incomplete drying or an overcrowded washer. | Tumble dry on low heat with dryer balls. Pull it out to shake and fluff every 30 minutes until it's completely dry. |
| Musty Smell | Trapped moisture leading to mildew. | Re-wash with one cup of white vinegar, add an extra rinse cycle, and then dry it thoroughly until bone-dry. |
| Soap Residue | Using too much detergent or a poor rinse cycle. | Dampen a clean cloth and blot the spots to lift the residue. For larger areas, a re-wash with no soap and an extra rinse will do the trick. |
| Pilling on the Cover | Friction during the wash cycle. | A bit of pilling is normal. If it’s excessive, understanding what causes fabric pilling can help you choose more durable fabrics in the future. |
With these tips, you can conquer any issue that arises. A little patience is all it takes to keep your duvet fresh, fluffy, and cozy.
Still Have Questions? Let's Talk Duvet Care
Even after mastering the washing technique, some questions always remain. Getting these final details right is what keeps your duvet feeling fresh and cozy for years, so let's clear up the most common concerns.
How Often Should I Really Wash My Duvet?
Here's the definitive answer: less often than you think. If you use a duvet cover (which is non-negotiable for proper hygiene), you only need to wash the duvet insert itself two to four times a year.
The cover is your duvet's frontline defense against body oils, sweat, and dirt. Wash that cover weekly with your sheets. The duvet itself only needs a deep clean seasonally or after a major spill. Over-washing will break down the delicate filling and destroy its loft.
Is It Really Safe to Wash a Down Duvet at Home?
Absolutely, but you must follow these rules. People ruin down duvets by making one simple mistake: using high heat. Heat strips the natural oils from the feathers, leaving them brittle and flat.
As long as your machine is large enough, you can get a professional-level clean. Here’s the action plan:
- Always use a front-loading machine. Top-loaders with agitators will tear your duvet apart.
- Keep it cool and gentle. Stick to a delicate cycle with warm water—never hot.
- Use the right soap. A mild, low-sudsing detergent made specifically for down is essential.
- Be patient with drying. Tumble dry on the lowest heat setting with dryer balls. It will take several hours, but it must be 100% dry to prevent mustiness.
A word of caution: if your duvet is old, has a delicate silk shell, or shows weakened seams, you must take it to a professional cleaner. A small dry-cleaning bill is far better than a laundry room that looks like a goose exploded.
What's the Best Way to Store a Clean Duvet?
Proper storage is key to pulling out a fresh, fluffy duvet when the seasons change. Once you are certain it’s completely dry, fold it loosely and place it in a breathable cotton or muslin storage bag.
Never store it in a plastic bag or airtight bin. Plastic traps moisture, which is a guaranteed recipe for mildew and that dreaded musty smell. A cool, dry linen closet or a spot under the bed is the perfect place for your duvet to hibernate.
A fresh, clean duvet is the heart of a cozy bed, but why stop there? True relaxation means being wrapped head-to-toe in pure softness. Don't deny yourself this comfort any longer. Discover the ultimate in homewear with TeddyPaws's collection of ultra-soft essentials, from our famous fluffy hoodies to plush sock slippers. You deserve to feel this comfortable all day, every day.
Stop waiting for comfort to find you. Explore our collections now at https://teddypaws.co and completely transform your downtime today.


